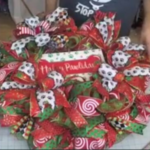
Happy Pawlidays Wreath
Equipment
- Scissors
- Rotary Cutter
- Ribbon Tail Board
- Probow by the hand
- Fluff Box
- Cutting Mat
- 26 gauge floral wire
Materials
- 1 15-24″ wreath frame
- 1 21″ deco mesh
- 1 10″ deco mesh
- 5 1.5″ wired ribbon
- 2 2.5″ wired ribbon
Instructions
Prepping your base
- Start with a circle wreath frame with twist ties attached.
- Using 21” size mesh, attach 10” long poofs all the way around the top and bottom layer. Securing with the twist ties.
- Trim off your mesh end.
- Cut 18 20” strips of mesh.
- Fold your edges into the middle and pinch to make a ruffle.
- Add a ruffle right on top of each twist tie.
Making and adding your tails & sign.
- Cut 18 14” ribbon tails using 3 ribbons. (18 of each ribbon)Dovetail them.
- Layer your 3 different tails, fold and pinch in half and add it directly to a twist tie, starting on the bottom.
- Repeat for all the ties at the bottom and Fluff out your tails.
- Add pieces of sticky back foam to the back of your sign.
- Using a staple gun, attach pipe cleaners to the sign over the foam pieces.
- Attach your sign to the middle of your wreath, securing it with pipe cleaners to the frame.
- Attach the rest of your ribbon tails to the top layer of your wreath.
Making and adding your bow.
- Using the 3 ribbons you used in your tails plus an additional 4 others.
- Using a pro bow maker in row D make a terri bow.
- Secure your layers together and fluff out your bow.
- Add your bow to your wreath on the top left above your sign.
Final touches
- Using 2 ribbons cut 3 14” long pieces of each.
- Layer one of each and fold them in half, pinch the center and add it to each corner of the sign. ( Not the corner with the bow.)
- Using the same ribbons, cut 3 20” pieces of each .
- Layer one of each, fold in a circle, squish the center and pinch it to make a bow.
- Add one of these on to each corner. (Not the corner where the terri bow is.)