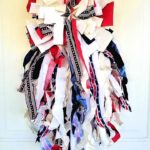
Get your EZ Bow Maker and fabric pieces.
Starting with your Long Base, take 3 different pieces and add it to your EZ Bow Maker back side facing up.
Layer these pieces top to bottom (vertically).
These are your tying pieces.
Begin adding your different pieces of cream fabric, white muslin, chunky chenille yarn, and your red and blue accent fabrics with the top side facing up.
Layer these pieces side to side (horizontally).
Next is your Short Base. Since these pieces are shorter, you can stagger them.
Start with a short side on the left for the first piece.
Alternate the next layer with the short side on the right.
Next layer can be added right down the center.
Repeat until you add all your short base pieces.
Next is the Bow. Take out your bow pieces.
Start with your 2.5” pieces and measure a 5” tail and make a 5” loop on each side making an “X.”
Repeat the previous step, alternating where you start your tail.
(e.g. if your tail for the first layer starts on the left, the next layer will start on the right side.)
Alternate whites and accent colors.
Continue the same process with the 1” pieces.
Suggestion: end with a white or cream colored on top, so when you add a centerpiece like a star, the star will stand out.
Once you finish your bow, take your tie pieces you added in the beginning and tie around the middle in between the pegs of the EZ Bow Maker.
Take the rag bow out of the bow maker and tie the tie pieces into a knot at the center nice and tight.
Fluff out your loops and shake out your bow. You can trim any tails that are too long and arrange how you like.
Add the star to the center of your bow using a hot glue gun.
Add a pipe cleaner to the back.
